Don't miss Capturing Potential 🚀, part 1 of the Taking Note series
🖥️ Installing Obsidian: Your Digital Knowledge Hub
Obsidian is a powerful platform that transforms how professionals organize, connect, and leverage their knowledge. Think of it as a personal knowledge management system that grows with your expertise and adapts to your unique workflow.
🎬 Lights, Camera, Obsidian!
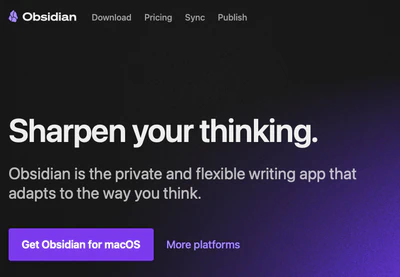
Bringing Obsidian into your tech toolkit is straightforward:
- Navigate to the official Obsidian website
- Choose the version that matches your operating system
- Windows users: Download the .exe installer
- Mac users: Grab the .dmg file
- Linux enthusiasts: Multiple package options available
- Run the installer and follow the intuitive setup wizard
- Launch Obsidian and prepare to revolutionize your digital workspace
🔮 Unleashing Your Digital Knowledge Sanctuary
Obsidian stores your notes in a “Vault”, which is essentially a top-level folder located on your hard drive with a hidden “.obsidian” subfolder with all of the settings. You can have as many different vaults as you want, and each one has its own independent settings. For instance, I have several personal vaults as well as a separate vault for each of my businesses. Since the settings are fully independent, I can keep my AI billing separate for each business and from my personal use.
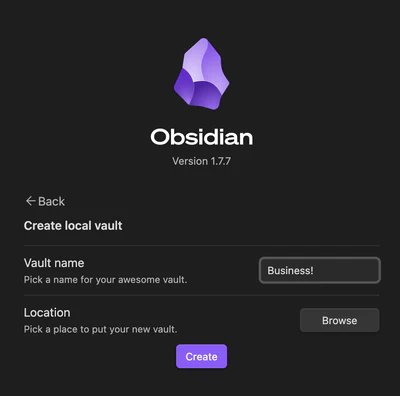
Inside the vault, you’ll create your “Notes”, which are stored as markdown files, and you can order them in folders. These notes & folders are fully accessible from outside of Obsidian - you never have to worry about vendor lock-in, and making backups is dead simple.
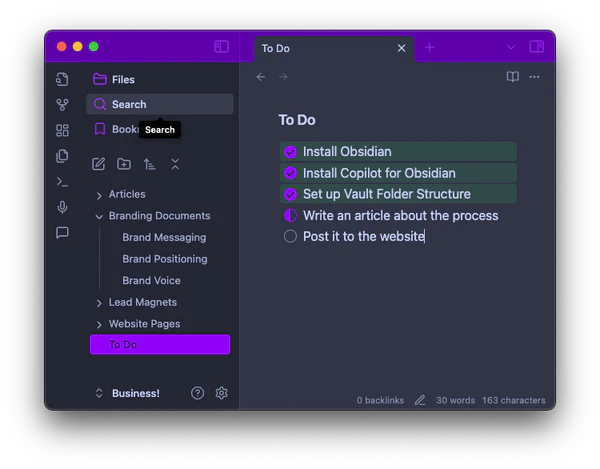
I like to keep it pretty simple - I create a folder for my business documents, where I keep all of the branding information that I’ll want to share with AI for context. And then I set up folders for different types of work that I do. For instance, I have a folder for new website articles that I’m editing, a folder for website copy, a folder for lead magnets, etc. But your organization is up to you!
📱 Knowledge Without Boundaries: Cross-Device Magic
Your knowledge shouldn’t be confined to a single device. Obsidian offers multiple strategies for accessing your vault across different platforms, each with its own pros and cons.
🌐 Obsidian Sync: The Official Solution
Obsidian’s official sync service is like having a personal knowledge assistant. It encrypts your data end-to-end, syncs across all your devices, and works seamlessly with most operating systems. While it is a paid service at $4/mo, the peace of mind and reliability are worth every penny for professionals who can’t afford to lose a single insight.
🍎 iCloud Sync: Apple Ecosystem Advantage
For those deep in the Apple ecosystem, iCloud offers a surprisingly robust solution. It’s free, integrates natively with your Apple devices, and gets the job done without breaking the bank. And since iOS 18.0, you can flag your vault folder to keep it downloaded to avoid sync delays on opening. Simply drag your vault into the Obsidian folder in iCloud, and you’re ready to roll.
🤖 Copilot for Obsidian: Bringing AI to Your Notes
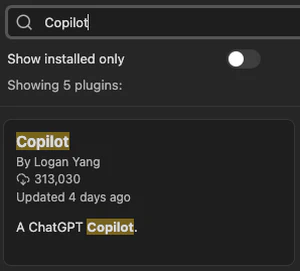
This is where the magic happens. The Copilot plugin transforms Obsidian from a note-taking app to an AI-powered knowledge assistant:
Under Settings -> Community Plugins, Turn on ‘Community Plugins’ if you haven’t already
Browse for “Copilot” by Logan Yang
Install the plugin, and then enable it
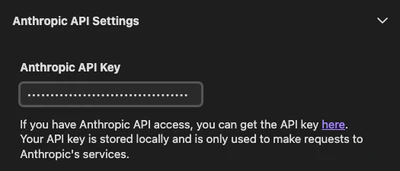
In the Copilot Options screen, scroll down to “API Settings” and configure the Anthropic API Settings
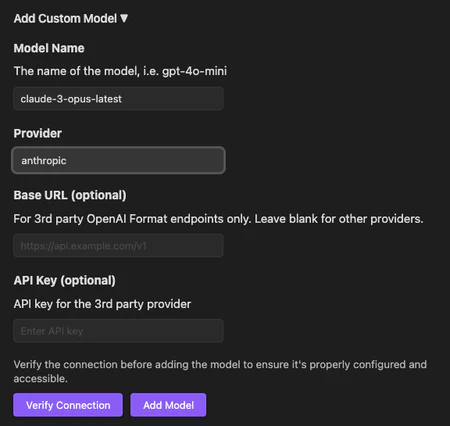
Scroll back up to “General Settings” and add any missing Claude models. claude-3-5-haiku-latest claude-3-5-sonnet-latest claude-3-opus-latest You can also “Delete” any pre-configured models that you won’t be using. Click the radio button on the left for the model that you want Copilot to start with.
💬 Mastering the AI Copilot Chat
Your new AI companion is ready to help. Whether you’re brainstorming, researching, or refining ideas, the Copilot chat is your go-to tool! I like to keep it up in the right sidebar so I can work with it side-by-side with my active note.
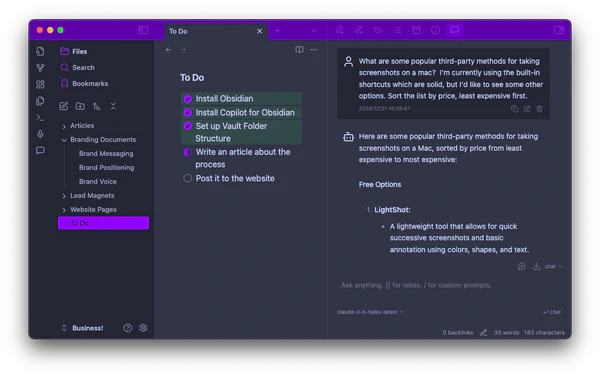
Make sure you have your desired model chosen in the bottom-left. I like to set my default to the least expensive model - you can always bump it up when you need a better answer. But I’ve found that Anthropic Claude’s Haiku 3.5 is an excellent balance of cost vs utility.
There are a few buttons to the top-right of the prompt window. The first one (a plus sign in a speech bubble) is how you start a new chat. By default, Copilot will automatically save your chats in a folder when you click this, but if you have that turned off then make sure to save anything you want to keep!
Which leads us to the next button (the download arrow) - ‘save chat’. This will save your current chat into a new note under the ‘copilot-conversations’ folder, although you can change that in the settings. And it will save the entire chat - prompts and responses. Your prompts will be prefaced with “user:” and the responses with “ai:”, and both will have the timestamps listed as well.
The third button is a drop-down allowing you to select the copilot mode. For most purposes, you’ll want the ‘chat’ mode enabled. Although, as we discussed earlier, the Vault QA mode can be very useful for larger vaults where you want to correlate data across multiple notes. But you can still reference individual notes in the chat mode! Include {activeNote} in your prompt to reference the note up in the editor window, or wrap the title of any note in double square brackets. In fact, simply typing [[ will bring up a list of notes you can choose from.
This is a great way to pull in information from your brand documents.
And that’s all there is to it! You now have a great setup to practice inexpensive, pay-as-you-go, AI assisted note taking.
🛠️ Precision AI Workflows
Once you’ve gotten into the hang of AI assisted note-taking, you may start to run into some limitations with standard chat interactions. You’ll want more sophisticated, repeatable ways to leverage your AI assistant.
🎨 Custom Prompts: Tailoring AI to Your Needs
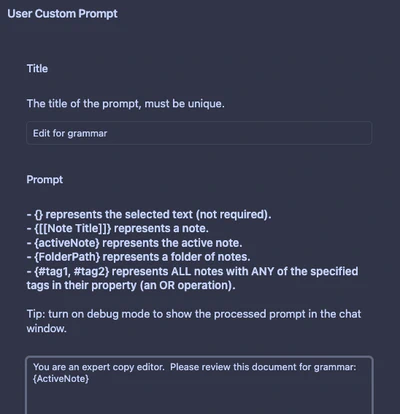
There are plenty of AI tasks that you’ll repeat regularly with Copilot, but you might have trouble remembering the prompt you used last time which worked so well! Enter Custom Prompts. With Custom Prompts, you can save the instructions that you use regularly with some simple templating to act on the active note or a text selection.
To start, you’ll need to fire the “Copilot: Add custom prompt” command. You can access this from the Obsidian Command Palette (Control/Command - P, or the icon in the toolbar). Give your prompt a unique title and enter the prompt in the window below. Some of the placeholders in the custom prompt window are a little bit different from the chat, but they’re all explained in the window.
Article Review - Content does not work, but Article Review-Content works fine!The {} placeholder for currently selected text is extremely useful - say you want to ask your AI model to help you reword a paragraph, or to suggest an emoji for a title. This is a great way to make a universal prompt that you can use over and over again by simply highlighting what you want to update.
The {activeNote}, {[[Note Title]]}, and {FolderPath} placeholders are my real bread and butter. I keep my primary business branding documentation in a {Branding} folder, then I’ll have tone, layout, length, and language specifications for a certain type of written content in spec note, like {[[Articles.Spec]]}. With that, I set up my Article Layout Check custom prompt like this:
You are a digital content marketing expert.  I run a business named "Interrupt 13" that helps professionals start their own businesses.  Here is my branding documentation to help you understand my brand position, messaging, and voice:
===============
Brand Docs:
{Branding}
===============

My articles should follow the tone, layout, length, and language specifications in this document:
===============
Article Spec:
{[[Article Spec]]}
===============

I'm working on the rough draft of a New Article.  I would like you to first compare it against my Brand Docs to ensure that the article fits with my brand, and provide me with a rating on how well the draft measures up against the brand guidelines.  Then I would like you to compare it against the Article Spec to ensure that it follows all of those guidelines, and provide a rating for each part of that Spec.
===============
New Article:
{activeNote}
Here I use a line of equal signs (==========) as dividers to provide the model with a clear demarcation on the inserted documentation - these aren’t actual commands, and you could use anything here. The purpose is to semantically split those documents up from my instructions to make it easier for the model to tell them apart. And I make sure to refer to the documentation the same way throughout the prompt and include that name inside the dividers to make the references as clear as possible.
⚙️ Tuning Your AI Collaboration Engine
Obsidian’s Copilot plugin is a flexible companion that adapts to your unique workflow. Let’s dive into how you can customize it to become your second brain.
⚡ Hotkey Mastery: Speed Up Your AI Interactions
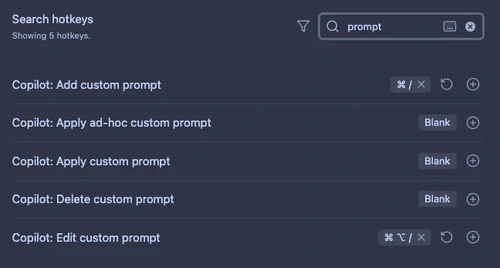
Professionals know that efficiency is the key to innovation. Going to the Obsidian command palette every time your want to use copilot is clunky, but Obsidian’s hotkey system lets you set up easy shortcuts to make it natural.
- Open Obsidian Settings > Hotkeys
- Search for Copilot commands:
- “Copilot: Toggle Sidebar”
- “Copilot: Add Custom Prompt”
- “Copilot: Edit Custom Prompt”
/ key is how you call a prompt in the chat window, I use Cmd-/ and Cmd-Opt-/ to add and edit prompts. By default Cmd-/ is assigned to ‘Toggle Comment’, and I never use the comment functionality in Obsidian so I removed that hotkey.🎛️ Dialing In Your AI Copilot
Think of these settings like the dials on a professional audio mixer—each one helps you craft the perfect AI responses:
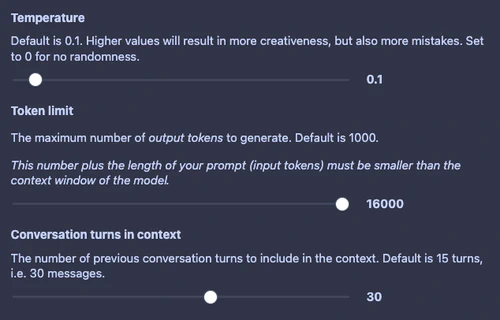
Temperature: Controls the AI’s ‘creativity’
- Low (0.1-0.3): Precise, factual responses
- Medium (0.5-0.7): Balanced creativity
- High (0.8-1.0): Maximum creative exploration
Token Limit: Manages model response length
- Typical ranges: 500-2000 tokens
- Start conservative and increase as needed
Conversation Turns: Tracks context retention
- More turns = Deeper context understanding, longer input prompt
- Fewer turns = More focused responses, shorter input prompt
🔍 Vault QA: Your Knowledge Detective
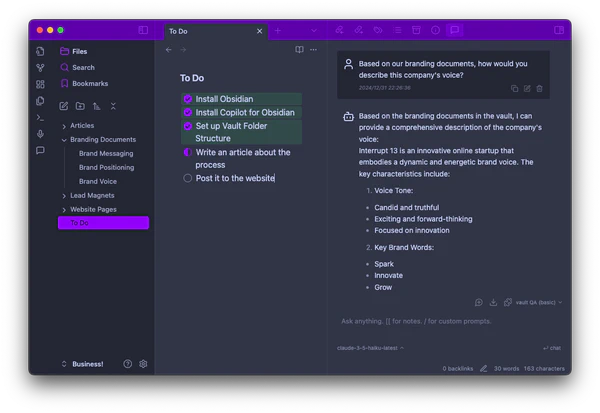
Imagine having a research assistant who can instantly scan through every note in your vault, pulling together insights from across your entire knowledge ecosystem. That’s the power of Vault QA mode.
Traditional chat interactions can quickly become expensive as you link multiple documents. Vault QA mode solves this challenge through Retrieval Augmented Generation (RAG) - a game-changing approach to knowledge management.
Instead of sending entire documents with each prompt, Vault QA uses an embedding model to create a searchable index of your entire vault. Think of it like creating a super-smart card catalog for your digital library. The result? Dramatically reduced API costs and lightning-fast, context-aware searches across all your notes.
🧪 Embedding Models: The Secret Ingredient
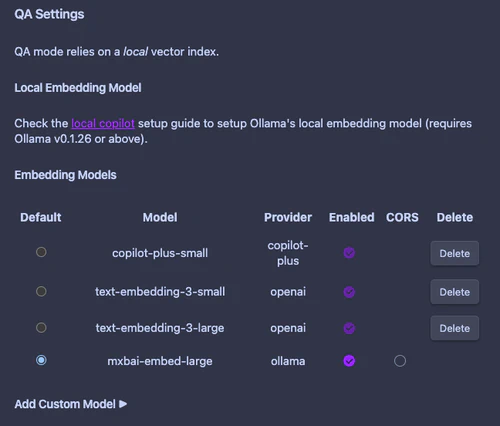
While the vault QA mode is powerful, it requires a separate embedding model to work. “Embedding” is the process of converting natural language into the numerical vector representation that the AI models use; it happens every time you submit a prompt to a chat model. But here, we’ll do it for your entire vault all at once, allowing the models to work directly with the data without bloating the chat context window.
You have several options to configure the embedding model in Copilot for Obsidian:
- OpenAI’s paid embedding model
- Google Gemini’s free tier (with very reasonable limits)
- Local self-hosted models (video tutorial coming soon!)
Worried about hardware requirements for self-hosting? Embedding models are nowhere near as resource intensive as chat models, making them accessible even for budget-conscious professionals.
🔧 Smart Software Strategies
Low-cost or free tools are a great way to keep your operating costs low. But keep in mind that many of these tools will come with trade-offs. Customer support is often community-driven through forums instead of real-time through phone calls, documentation is often not as solid, and the applications might be a little rougher around the edges than polished commercial software. What you save in monthly subscriptions may not offset the extra time you have to put in.
🌱 Nurturing the Low-Cost Software Ecosystem
In order to keep great low-cost tools available, your support is essential! And the good news is that there are many ways to support your favorite tools.
Financial Support: Many low-cost and open-source tools have paid add-ons that support the development of the core functionality. For instance, Obsidian has their paid Sync and Publish services, while Copilot for Obsidian will soon release their Copilot Plus tier. And many authors have Patreon or Ko-Fi pages where you can make a direct donation.
Engagement: Be a part of the community! Whether it’s an online forum, a Discord group, a subreddit: join the discussion to let the authors know you appreciate their work, ask questions about usage, or make suggestions. If you find bugs, post about them on their Github issues page.
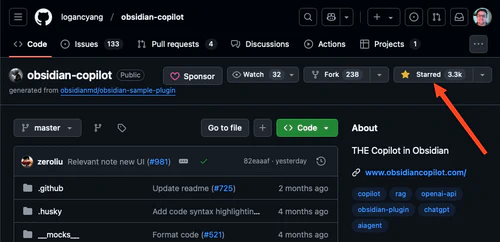
Like & Subscribe: The Github version of Youtube’s ’like & subscribe’ is to star the repository. These stars are part of a lot of metrics that can really change the course of an app.
Pull Requests: If you know the language the project is in, why not contribute directly to the code base? Many projects flag issues with the “Good First Issue” flag. As a new business founder you probably won’t have much free time, but if adding a feature helps your workflow, it might be a win-win!
🔭 Zooming Out To Your Entrepreneurial Horizon
Remember, every tool you choose is an investment in your professional journey. And by supporting and engaging with low-cost, community-driven tools, you’ll save money and and empower other professionals just like yourself who are starting their own businesses!
🌐 Your AI-Powered Knowledge Journey Starts Now
Obsidian and Copilot are your gateway to advanced knowledge management, transforming how you capture, connect, and leverage your thoughts. By embracing AI-assisted note-taking, you’re organizing information into a personal innovation engine that grows with your business.
Start small: install Obsidian, experiment with the Copilot plugin. Build your vault, one insight at a time. Your entrepreneurial journey isn’t about perfection—it’s about continuous learning and intentional design.
Join our Discourse community and share your AI note-taking journey. Your story could be the inspiration another professional needs to take their first step.
Transform your notes into knowledge, amplified by AI! 🚀


